Kitchen Organization Hacks That Make Daily Tasks Easier
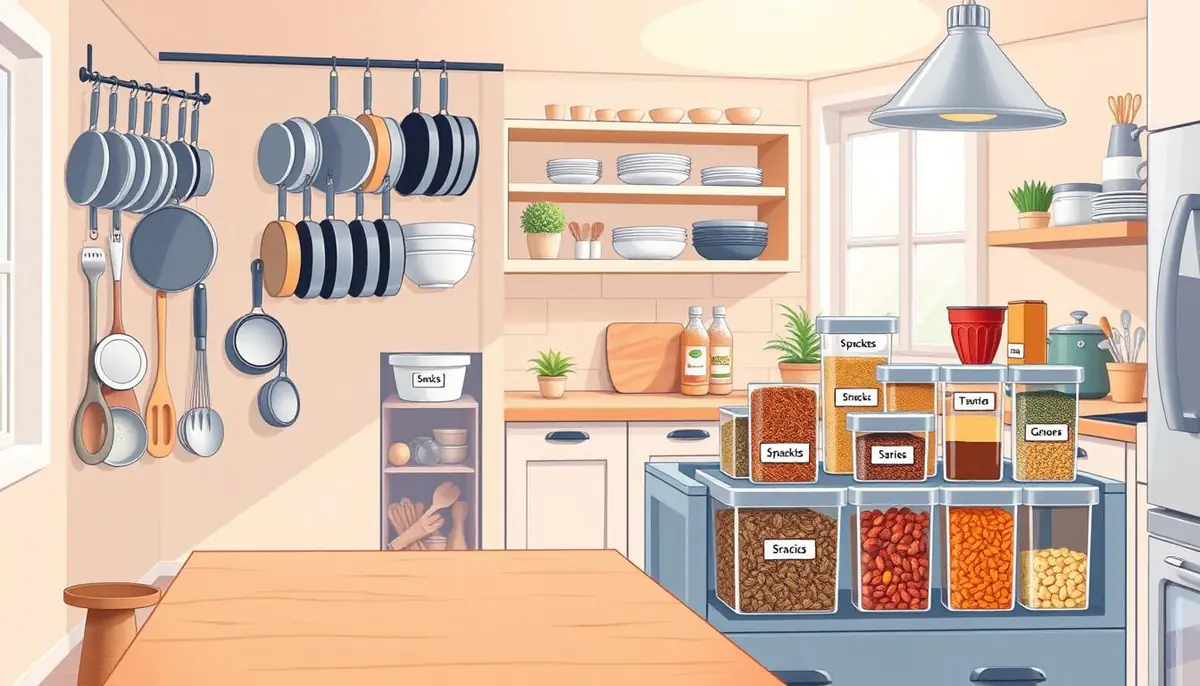
A messy kitchen makes things hard to find. It wastes time and causes stress. But, simple tricks can make your kitchen better.
You don’t need to spend a lot to make your kitchen better. Just measure your space and sort things out. This makes your kitchen calm and ready for cooking.
This guide shows you how to organize your kitchen. It talks about drawers, shelves, and more. With these tips, your kitchen will be easy to use.
Set Up a Kitchen Organization Plan That Fits Daily Routines
To organize your kitchen well, watch how you cook. Many people buy storage bins without knowing their cooking habits. A good layout fits how you naturally move, not the other way around.
Step 1: Identify the Tasks That Cause the Most Friction
Notice what makes you upset while cooking. Do you always move a heavy blender to get to a cutting board? Or do you waste time looking for a measuring spoon in a messy drawer?
Spotting these trouble spots is key. Knowing what slows you down helps you plan to fix it. These small changes can make your kitchen much more organized and save you time every day.
Step 2: Group Items by How and When They Are Used
After finding your trouble spots, sort your things by how often you use them. Daily items like coffee mugs or spatulas go in easy-to-reach places. Less-used items, like holiday dishes, go in harder spots.
Organizing by task keeps your counters clear. For example, put all your breakfast stuff in one cabinet near the toaster. This way, everything you need is where you expect it.
Step 3: Measure Cabinets, Drawers, and Countertop Areas Before Buying Organizers
Before buying storage, measure your space with a tape measure. Knowing the exact sizes helps avoid buying bins or organizers that don’t fit.
Account for Door Clearance, Shelf Height, and Appliance Space
Remember to measure for door clearance and shelf height. Make sure your new organizers don’t block cabinet doors. Always check the height between shelves for tall items like blenders or cereal boxes.
Also, think about your appliances’ size. If you have a mixer or food processor, measure the counter depth. This ensures your kitchen stays organized and efficient.
Declutter Kitchen Counters for Faster Food Preparation
Learning to use kitchen storage well starts with clean counters. When counters are clear, cooking time goes down. A clean space helps you move better and cook safely.
Step 1: Remove Items That Do Not Support Daily Tasks
Look at each thing on your counters. If it’s not needed daily, it should go in a cabinet. Try to declutter kitchen counters by getting rid of things like decorations and extra tools.
Step 2: Keep Frequently Used Appliances Within Easy Reach
Find out which appliances you use every day, like toasters or coffee makers. These should stay on the counter. Other items, like blenders, go away when not used.
Step 3: Create Dedicated Zones for Coffee, Breakfast, and Meal Prep
Organize your counters into zones for better order. This way, you don’t have to move around the kitchen a lot. Here are some zone ideas:
- Coffee Zone: Keep your mugs, coffee beans, and filters near the machine.
- Breakfast Zone: Store cereal, bowls, and spreads in one corner.
- Meal Prep Zone: Keep this area clear for cutting boards and bowls.
Use a Tray to Contain Small Items and Simplify Cleaning
A tray is great for keeping small things together. It keeps counters clean and makes cleaning easier. Just lift the tray to clean underneath.
Step 4: Hide Cords and Store Occasional Appliances Elsewhere
Visible cords can make your kitchen look messy. Use clips or sleeves to hide them. Store less-used appliances in a pantry or cabinet to use space better.
| Appliance Type | Storage Location | Frequency of Use |
|---|---|---|
| Coffee Maker | Countertop | Daily |
| Toaster | Countertop | Daily |
| Stand Mixer | Lower Cabinet | Weekly |
| Waffle Iron | Pantry | Monthly |
Arrange Cabinets So Everyday Items Stay Easy to Reach
Make your kitchen cabinets efficient with a simple plan. Focus on cabinet organization to turn chaos into order. This helps your daily cooking routine.
Step 1: Empty One Cabinet at a Time
Start by cleaning one cabinet at a time. This keeps you from feeling too much. It lets you clean well and decide where to put things.
Step 2: Place Heavy Cookware on Lower Shelves
Put heavy items like cast iron skillets on the bottom. This saves your back and keeps things from falling. It makes your big items easy to get to.
Step 3: Store Frequently Used Dishes Between Waist and Eye Level
Put daily items like plates and mugs in easy spots. This makes mornings and evenings quicker. It’s a big help.
Step 4: Use Shelf Risers, Pull-Out Bins, and Turntables Strategically
Use shelf risers and turntables to use space better. They help you reach items easily. Pull-out bins keep small things organized.
Prevent Overcrowding by Leaving Room to Remove Each Item
Don’t fill cabinets too much. Leave space to pull out items without trouble. This makes your kitchen work better.
| Storage Tool | Best Use Case | Primary Benefit |
|---|---|---|
| Shelf Risers | Canned goods and plates | Increases vertical capacity |
| Turntables | Spices and condiments | Improves item visibility |
| Pull-Out Bins | Small packets and tools | Prevents items from getting lost |
Organize Drawers to Make Cooking Tools Easier to Find
When cooking tools are scattered, meal prep becomes hard. Using drawer organizers makes your space better. It saves time every day.
Step 1: Sort Utensils by Function Instead of Shape
Many sort by size or look. But, sort by use. This way, your whisk, spatula, and tongs are easy to find.
Step 2: Use Adjustable Dividers for Cooking and Serving Tools
Long utensils can get stuck. Adjustable dividers fit your tools well. This keeps your space neat.
Step 3: Store Knives Safely in a Drawer Block or Dedicated Insert
Keep sharp tools safe. A knife insert protects blades from damage.
Keep Sharp Blades Separate From Loose Utensils
Knives in a block avoid cuts. They stay sharp longer.
Step 4: Give Wraps, Bags, and Measuring Tools Their Own Sections
Items like plastic wrap and bags clutter. Give them their own spot. This keeps your main area clean.
Position High-Use Items Near the Main Preparation Area
Put often-used tools near your cutting board. This makes cooking faster and easier.
Create a More Efficient Refrigerator and Freezer System
A tidy fridge and freezer change how we eat at home. They help us find what we need fast. This means we enjoy cooking more. Refrigerator organization keeps things neat and stops food from going bad.
Step 1: Remove Expired Food and Wipe Shelves Before Restocking
First, take out everything from the fridge. Check the dates on food to keep only fresh items. Then, clean the shelves with a soft cleaner to get rid of spills and crumbs.
Step 2: Assign Refrigerator Zones to Specific Food Categories
Keeping things the same way helps a lot. Grouping similar foods makes it easy for everyone. Here’s a good way to set up your fridge:
| Zone | Food Category | Placement Tip |
|---|---|---|
| Top Shelf | Ready-to-eat items | Keep at eye level |
| Middle Shelf | Dairy and eggs | Store near the back |
| Bottom Shelf | Raw meat and fish | Use a leak-proof tray |
Keep Ready-to-Eat Foods Above Raw Ingredients
Food safety is very important. Put cooked foods and snacks on top shelves. This stops raw juices from getting on other foods.
Step 3: Use Clear Bins to Group Snacks, Produce, and Meal Components
Clear bins are like drawers for your fridge. They help you find what you need quickly. Clear containers also make it easy to see what you have, which helps when you shop.
Step 4: Label Freezer Containers With Contents and Dates
Good freezer organization means planning ahead. Use labels to know what’s inside and when it was frozen. This helps you use up older food and saves money.
Freeze Food Flat to Save Space and Speed Up Thawing
Freezing foods flat is smart. It saves space and thaws faster. Here’s why it’s good for your kitchen:
- Maximizes space by stacking bags like books.
- Speeds up thawing because of more surface area.
- Improves visibility, making it easy to see what’s inside.
Improve Pantry Storage With Visible, Practical Categories
A good pantry makes cooking easy. Pantry organization helps you see what you have. This stops you from buying too much and throwing food away.
Step 1: Remove Duplicates, Stale Products, and Unused Ingredients
Start by checking everything in your pantry. Take everything off the shelves to see what’s still good.
- Throw away old spices and canned goods.
- Give away unopened items you won’t use.
- Put together all the same things like flour or sugar.
Step 2: Arrange Food by Category and Expiration Date
Put things in groups like baking, breakfast, snacks, and dinner. This makes finding ingredients easy.
Put the newest items at the front. This way, you use the oldest first.
Step 3: Transfer Frequently Used Dry Goods to Airtight Containers
Use food storage containers to keep things fresh. Clear containers help you see what you have.
Label Containers Clearly and Preserve Package Instructions
Labels help everyone know what’s in the containers. When you move things, keep the cooking instructions on the container.
Step 4: Use Bins for Small Packages and Risers for Cans
Small packets like seasoning mixes can clutter up your space. Use clear bins to keep them organized.
For canned goods, shelf risers are key. They make sure you can see all the labels.
Leave a Small Backstock Area for Bulk Purchases
Buying in bulk saves money, but it can get messy. Set aside a special area for bulk items.
| Storage Tool | Primary Benefit | Best Use Case |
|---|---|---|
| Airtight Containers | Freshness | Flour, Rice, Pasta |
| Clear Bins | Visibility | Snacks, Packets |
| Shelf Risers | Accessibility | Canned Goods |
Make Under-Sink and Cleaning Storage Safer and More Useful
The area under your kitchen sink can get messy. It’s filled with half-empty bottles and forgotten sponges. You can make this space better for your cleaning needs.
Step 1: Remove Leaking Products and Unused Cleaning Supplies
First, take everything out. Check each item for leaks or damage. Throw away expired or unused items to free up space.
Step 2: Place Everyday Supplies in a Removable Caddy
A portable caddy is great for cleaning. It lets you carry all your cleaning stuff easily. You won’t have to make many trips.
Step 3: Use Vertical Space for Sponges, Brushes, and Gloves
Use adhesive hooks or small racks on cabinet doors. They hold wet items up, keeping them off the floor. This helps them dry better.
Protect the Cabinet Base With a Waterproof Liner
A waterproof liner is a smart choice. It stops small spills or leaks from causing damage. It also makes cleaning easier.
Step 4: Store Cleaning Chemicals Away From Food and Children
Keep harsh chemicals high up or in a child-proof lock. Never store them near food. This prevents accidents.
Never Mix Bleach With Ammonia or Other Cleaning Products
Always be careful with cleaning products. Mixing bleach and ammonia is very dangerous. It can release harmful gases. Always keep these products apart.
Use Kitchen Organization Hacks to Simplify Meal Preparation
Effective meal prep organization makes your kitchen work better. It helps you move faster and feel less tired. By setting up kitchen zones, you know where everything is.
Step 1: Build a Prep Zone Around the Main Cutting Board
The best kitchens focus on a main cutting board. Keep this area clean for chopping and slicing. This way, you spend more time cooking and less time cleaning.
Step 2: Keep Knives, Mixing Bowls, Measuring Tools, and Seasonings Nearby
Having things close saves time. Store knives, bowls, and tools near your cutting board. Also, keep seasonings in a rack close by. This stops you from running around the kitchen.
Step 3: Prepare Reusable Ingredients in Batches
Batching is great for busy homes. Wash, peel, and chop veggies ahead of time. This makes cooking easier and less messy.
Store Chopped Ingredients in Clearly Labeled Containers
Use clear containers for prepped items. Label them with the date. This keeps your fridge neat and helps you use food before it spoils.
Step 4: Create a Small “Use First” Area for Opened Foods
Have a special shelf for opened foods. Put jars, half-used veggies, and packages there. This helps you use them up and avoid waste.
Check the Area Before Starting the Next Grocery Trip
Look at your “Use First” area before shopping. This stops you from buying things you already have. It saves money and keeps your kitchen tidy.
| Prep Strategy | Primary Benefit | Time Saved |
|---|---|---|
| Centralized Prep Zone | Reduced movement | High |
| Batch Ingredient Prep | Faster cooking | Very High |
| Use First Area | Less food waste | Medium |
Organize Small Kitchen Items Without Filling Every Surface
Keeping your small kitchen organized is key to a stress-free cooking space. Clutter from tiny items makes cooking hard. Simple habits can help keep your space clear and tools easy to find.
Step 1: Consolidate Reusable Bags, Food Containers, and Lids
First, collect all your reusable bags and containers in one spot. Putting them together stops them from spreading out. Use a deep bin or a special drawer to keep them organized.
Step 2: Match Food Storage Containers With Their Lids
Looking for a lid can be frustrating. Make sure to pair each container with its lid. If a container is missing a lid, it’s time to throw it away to save space.
Step 3: Use Wall, Door, and Side-Cabinet Space Carefully
Using vertical space is smart for keeping counters clear. Put hooks or magnetic strips on cabinet doors to hold tools. This keeps your counters free for cooking.
Choose Secure Storage That Does Not Block Work Areas
When adding storage, make sure it’s secure and doesn’t get in the way. You want to move freely and access your appliances easily. Safety and easy access are key when setting up organizers.
Step 4: Contain Batteries, Pet Supplies, and Miscellaneous Items in Labeled Bins
Items like batteries and pet supplies often clutter a “junk drawer.” Use small bins with labels to organize them. This keeps your kitchen neat and prevents clutter on your counters.
| Item Category | Storage Method | Benefit |
|---|---|---|
| Reusable Bags | Vertical Dispenser | Saves space |
| Food Lids | Divided Bin | Easy matching |
| Miscellaneous | Labeled Bins | Quick retrieval |
By following these steps, your kitchen will be much easier to work in. A clean space is easier to maintain when everything has its place.
Build a Quick Reset Routine That Keeps the Kitchen Organized
Keeping your kitchen clean is not just about setting it up. It’s about doing it every day. A simple kitchen reset routine helps stop messes before they get big. This way, your kitchen stays neat and inviting every day.
Step 1: Return Every Item to Its Assigned Home After Use
Putting things back right after you use them is key to avoiding clutter. When everything has its place, cleaning is easier. This makes cooking smoother and more enjoyable.
Step 2: Clear Counters and Load the Dishwasher During the Evening Reset
Evening is the best time to clean your kitchen. Start by clearing everything off the counters. Then, wash dishes in the dishwasher. This way, you wake up to a clean kitchen.
Step 3: Wipe High-Touch Areas and Check the Sink
After clearing counters, clean high-touch spots like handles and buttons. Don’t forget to clean the sink. A kitchen organization checklist helps you remember these important steps.
Step 4: Review the Refrigerator and “Use First” Area Weekly
Once a week, check the fridge for expired food. Also, make sure older food is used first. This saves food and keeps your kitchen organized.
Adjust Storage When a Category Repeatedly Becomes Cluttered
If a drawer or shelf always gets messy, it’s time to change how you store things. Clutter means your storage doesn’t fit your needs. Changing your setup can fix this problem for good.
| Task Frequency | Primary Action | Expected Outcome |
|---|---|---|
| Daily | Clear counters and load dishwasher | Reduced morning stress |
| Daily | Wipe high-touch surfaces | Improved kitchen hygiene |
| Weekly | Review fridge and pantry | Minimized food waste |
| Monthly | Re-evaluate storage zones | Optimized workflow efficiency |
Conclusion
Creating an organized kitchen is about making habits, not buying fancy gadgets. It’s about making systems that fit your daily life.
Start by putting heavy things on low shelves. Keep your most-used tools close. Use clear labels and safe spots for cleaning stuff. This keeps everyone safe and makes the kitchen easy to use.
Every day, clean up your counters and sink fast. This keeps your kitchen looking good and working well.
Check your fridge and pantry every week. This helps keep things in order as your needs change. These small steps make your kitchen a peaceful place for cooking and hanging out.
By following these simple steps, your kitchen will support your lifestyle better. It will become a calm and organized space.